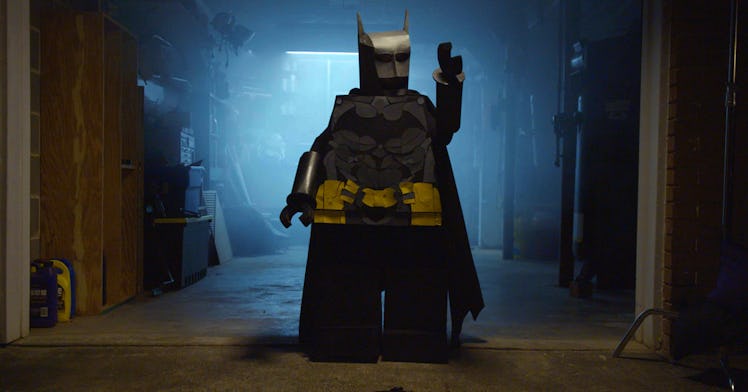
How to Build the Ultimate LEGO Batman™ Costume
Take your cosplay to the next level with this insanely innovative LEGO® Batman™ costume.

The following is brought to you by LEGO®, makers of the new App-Controlled Batmobile™.
Martin Sims has been building brilliant cosplay, or “costume play,” getups since 2002. When his son Keaden was born, Marin took his designs to another level, crafting lifelike outfits from popular TV shows, movies, and video games. Now the two work together and the results, which incorporate LED lights and microprocessors for realistic lighting effects, have helped them win multiple costume contests in their native Atlanta and earned Keaden a killer nickname: “The Cosplay Kid.”
The dynamic duo’s latest project was a Kaeden-sized version of everybody’s favorite diminutive crime fighter: LEGO Batman. Don’t let the Sims’ experience scare you; a LEGO Batman costume, made with materials you can find around the house, is a perfect weekend-long project for even first-time cosplay creators. Even better, as the step-by-step guide below makes clear, as you embark as a family on planning the design, cutting out the pieces, attaching everything together and painting the whole thing, you’ll be engaged in hands-on exploration of kid-friendly engineering concepts.
Step 1: Gather Your Materials
The armor will be made out of cardboard, so start by locating three or four large boxes, roughly 18” x 18” x 24”. You will also want a flexible material for certain elements of the costume, so grab a few black poster boards (or use a different color that you will later paint black). For the cape, it’s best to get a large piece of black felt fabric, roughly 32 inches wide and 50 inches long. Other necessary materials include two short wooden dowels, several cans of black spray paint, and liquid paint in yellow and grey for costume details. You will also want a glue gun, a box cutter, scissors, and a black long-sleeve shirt and pants to be worn under the suit. Don’t forget to include your kid in the material selection process by asking them pointed questions: What kind of cardboard would be the sturdiest? What sort of fabric would be best for the cape?
Step 2: Measure Your Superhero
Nobody likes an ill-fitting superhero costume, so make sure to take careful measurements of your LEGO Batman™. Use a measuring tape to measure the width of your child’s shoulders, the width and length of their torso, the distance from their waist and their inseam to the ground, and the circumference of their head. Along the way, give them a lesson in measuring radius, diameter, and circumference.
Step 3: Build the Legs
When putting together the costume, start from the bottom up. Cut out pieces of cardboard to fashion two four-sided rectangular legs, with protrusions for feet at the bottom and circular joint pieces near the waist. Scavenge the corner pieces from the boxes you’ve cut up and use them to reinforce the joints where you fasten the cardboard pieces together with your hot glue gun. Ask your kid to explain why you would want to reinforce the corners.
Step 4: Construct the Torso
Similar to how you built the leg pieces, cut out five large pieces of cardboard to fashion the torso. Make sure the width at the top is slightly larger than the width of your kid’s shoulders, and the torso should splay slightly outwards towards the waist. Keep the bottom of the torso open, and make sure to cut appropriate-sized holes for your child’s arms and head. Once again, reinforce the joints with corner pieces from your boxes.
Step 5: Fashion the Hands
To build the arms of your LEGO Batman™, roll two tubes out of poster board that are long enough and wide enough to slip over your child’s forearms, then reinforce the inside of the tubes with strips of cardboard. For each hand, cut out six C-shaped hand shapes, then glue them all together. Affix a dowel to the back of each hand and slide them into the forearm tubes, so your kid can grasp and twist the hands.
Step 6: Cut Out the Cape
Cut out a billowing triangular cape from your felt or other kind of fabric, about 32 inches long and 50 inches wide. Fashion points along the bottom, and cut out an appropriately sized hole at the top so your child can slip it over his or her head.
Step 7: Assemble the Head
Use poster board for the cowl, making sure to include spiky ears, a triangular nose, and ominous eye holes. The resulting head piece should be just slightly larger than the circumference of your kid’s head, so it fits snugly but is not uncomfortable.
Step 8: Paint Your Costume
Using appropriate eye and mouth protection and working in a well-ventilated space, spray paint all your costume pieces black. Once everything is dry, use the yellow and grey liquid paints to add a utility belt, chest-plate elements, and bat insignia. In true LEGO fashion, feel free to let your kids’ imagination run wild the details. If he or she wants to add a plunger to the LEGO Batman™ utility belt and change the insignia to a lightning bolt, have at it!
Step 9: Fight (Imaginary) Crime!
Once everything is dry, it’s time to take your LEGO Batman™ costume for a test drive. As Martin and Keaden Sims discovered, the getup is sure to inspire the heroic crime fighter in all of us. Watch out, Gotham City evildoers: LEGO Batman™ is on the case.
© & TM DC Comics. (s18)
© & TM The LEGO Group.
This article was originally published on