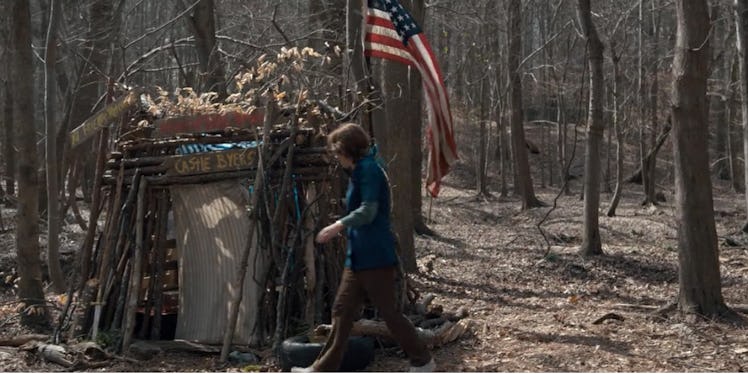
How To Build A Stick Fort In The Woods, With A Master Architect
Sticks and stones — will make a pretty cool fort for your kids.

For more advice on fun stuff to do with your kids, from ridiculously overqualified experts, check out the rest of our 940 Weekends.
It’s too hot for snow forts, your kid’s worn out the couch cushions making pillow forts, and you put out all the recycling before they could make their next cardboard fort. Time to send them out into the woods, grab some sticks, and get started on the next level of DIY clubhouses: A stick fort.
David Pascu, award-winning Associate Principal architect at Abramson Teiger Architects, has worked on everything from homes to schools to kicking the hipsters out of the McCarren Park Pool in Brooklyn and restoring it to its former glory. But the project his 4 and 8-year-old kids were most stoked about was the all-natural fort they made out in the woods during a camping trip. “We found this area where someone had gathered up all these sticks and kind of arranged them into a circle, and my 8-year-old just said, ‘I want to build a fort,’” says Pascu. Apparently ignoring the possibility that it was actually a serial killer’s calling card, that’s what they did. Now he has some tips for you and your kid to make your own this weekend.
Location, Location, Location
You’ll want to find a nice, flat spot to start building, and it should be next to a tree or a large rock. If your yard isn’t the Yellowstone of the suburbs, your kid’s Fisher Price slide will probably do. Everything should lean towards your tree or tree-like substitute.
Mother Nature Is Your Home Depot
You can find all the materials you need literally right in your own backyard. “It’s mostly about having sticks that are about the right length, and then there are a few important ones that have to have a crook or notch in them,” says Pascu. Those are your 4 “main rafters,” which go at either end of the fort, crossed to form an acute triangle and hold up the ends of the “main ridge.”
It helps to insert one end of your ridge into a depression on your tree. The uniformity of your “common rafters” that get leaned up against the sides doesn’t have to be perfect — you just need a lot of them. “You can take longer sticks and break them to get the right size,” adds Pascu. “Little kids love breaking things.” Just don’t let them start snapping branches off trees, or your local Lorax might show up.
All About That Base
One thing your kid will definitely need your help with is gathering up larger logs, rocks, or heavy bark to go around the bottom of the fort. “Everything at the base should be heavy, and everything going up near the ridge is light,” says Pascu. “That’s for safety, so that it doesn’t collapse.” By the way: Before they go inside, you should give the finished fort a light shake to make sure it won’t fall on your collective heads. That way your next project won’t be building stretchers out of sticks.
Sometimes, There Aren’t Enough Sticks
If you can’t find bark or vines to cover the roof, you could go in the house and steal a sheet off a bed. Or you could let them figure it out. “Once you get it to a point where the framework is secure, they can add the material that’s going to be the roof of the structure, and it’s fun to just step back and watch them work,” says Pascu. This is supposed to be their fort, remember?
It Really Ties The Whole Fort Together
There’s one more way that you, responsible father, should intervene. Use some twine or string to make the whole structure more secure. “If we could have tied the branches and the rafters together [in the woods], I definitely would have done that,” says Pascu. “Really the thing to watch out for as you’re putting the common rafters up and leaning them towards the ridge is that they could slide to the right or left.” It’s not 100 percent necessary, but will definitely make your life easier and keep your kid from getting frustrated by watching the whole thing literally fall apart.
This article was originally published on